mirror of
https://github.com/supabase/supabase.git
synced 2026-10-05 17:35:10 +03:00
 Ivan Vasilov
d07e78a616
Ivan Vasilov
d07e78a616
This PR runs `prettier` on the `examples` folder.

Depends on https://github.com/supabase/supabase/pull/43849.
352 lines
10 KiB
Markdown
352 lines
10 KiB
Markdown
# Build a User Management App with React
|
|
|
|
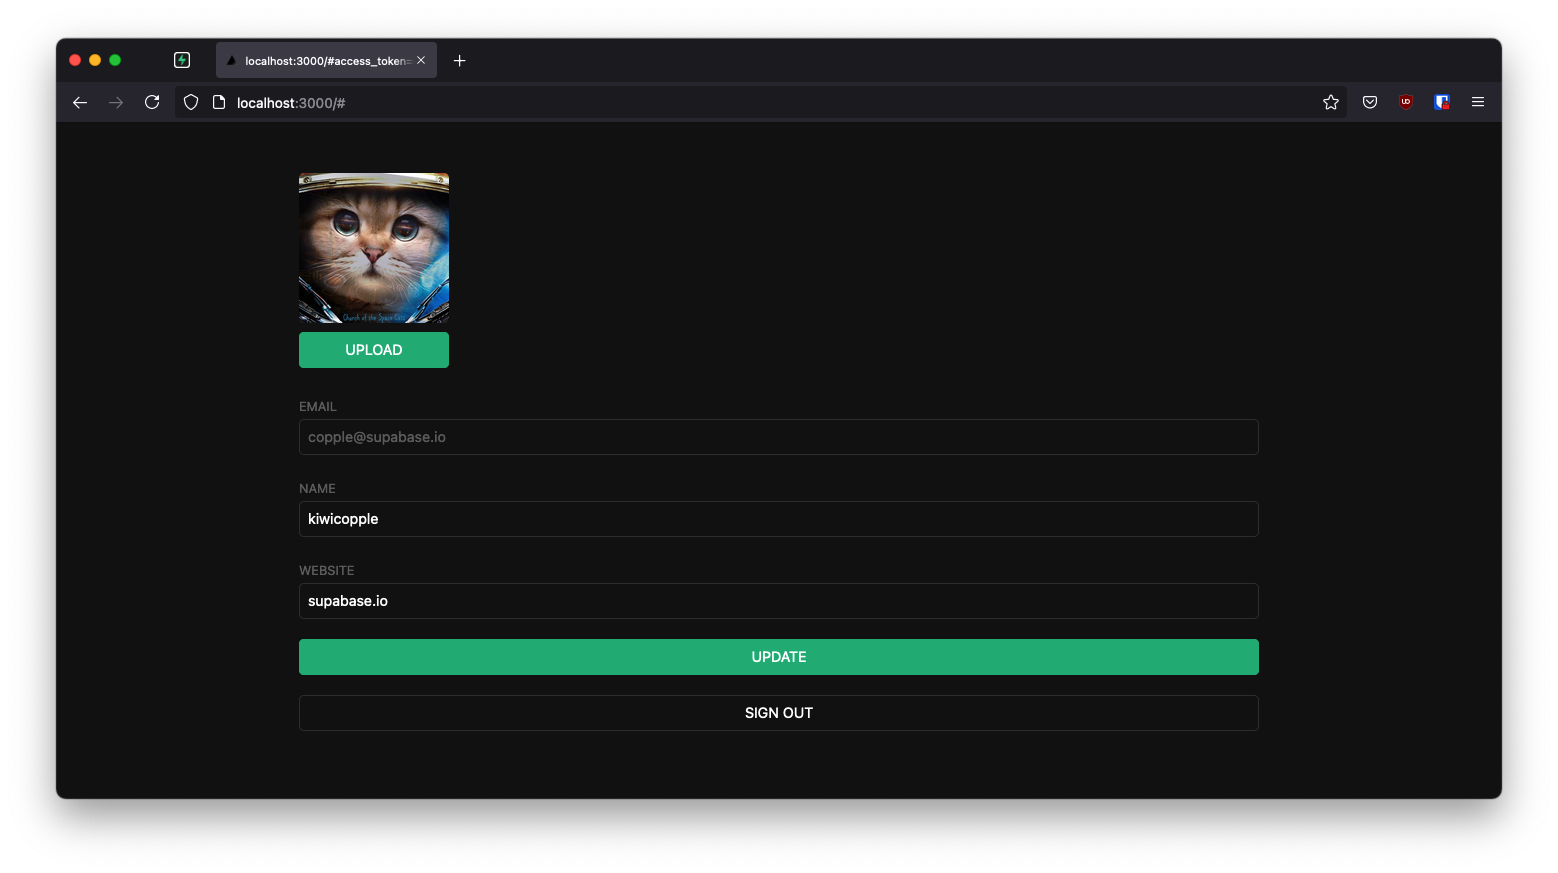
This example demonstrates how to build a user management app with React and Supabase. Users can sign up with a magic link and then update their account with public profile information, including a profile image.
|
|
|
|
|
|
|
|
## Features
|
|
|
|
This app demonstrates how to use:
|
|
|
|
- User signups using Supabase [Auth](https://supabase.com/auth) with Magic Links
|
|
- User avatar images using Supabase [Storage](https://supabase.com/storage)
|
|
- Public profiles restricted with [Row Level Security](https://supabase.com/docs/guides/auth#row-level-security)
|
|
- Frontend using [Vite](https://vitejs.dev/) and React
|
|
- The [`getUser()`](https://supabase.com/docs/reference/javascript/auth-getuser) method to fetch current user details
|
|
|
|
## Technologies Used
|
|
|
|
- **Frontend:**
|
|
- [Vite](https://vitejs.dev/) - Fast React development toolchain
|
|
- [Supabase.js](https://supabase.com/docs/library/getting-started) - For user management and data syncing
|
|
- **Backend:**
|
|
- [Supabase](https://supabase.com/dashboard) - Hosted Postgres database with RESTful API
|
|
|
|
## Getting Started
|
|
|
|
### Prerequisites
|
|
|
|
Before you begin, make sure you have:
|
|
|
|
- A Supabase account ([sign up here](https://supabase.com/dashboard))
|
|
- Node.js installed on your machine
|
|
|
|
### 1. Create a Supabase Project
|
|
|
|
1. Sign in to [Supabase Dashboard](https://supabase.com/dashboard)
|
|
2. Create a new project
|
|
3. Wait for your database to start
|
|
|
|
### 2. Set Up the Database
|
|
|
|
Once your database has started:
|
|
|
|
1. Go to the **SQL Editor** in your project dashboard
|
|
2. Scroll down to find **"User Management Starter"** quickstart
|
|
3. Click it and then click **RUN** to execute the query
|
|
4. This will create a `profiles` table - verify it in the **Table Editor**
|
|
|
|
The quickstart creates the following schema:
|
|
|
|
```sql
|
|
-- Create a table for Public Profiles
|
|
create table profiles (
|
|
id uuid references auth.users not null,
|
|
updated_at timestamp with time zone,
|
|
username text unique,
|
|
avatar_url text,
|
|
website text,
|
|
primary key (id),
|
|
unique (username),
|
|
constraint username_length check (char_length(username) >= 3)
|
|
);
|
|
|
|
alter table profiles enable row level security;
|
|
|
|
create policy "Public profiles are viewable by everyone."
|
|
on profiles for select using (true);
|
|
|
|
create policy "Users can insert their own profile."
|
|
on profiles for insert with check ((select auth.uid()) = id);
|
|
|
|
create policy "Users can update own profile."
|
|
on profiles for update using ((select auth.uid()) = id);
|
|
|
|
-- Set up Storage for avatars
|
|
insert into storage.buckets (id, name) values ('avatars', 'avatars');
|
|
|
|
create policy "Avatar images are publicly accessible."
|
|
on storage.objects for select using (bucket_id = 'avatars');
|
|
|
|
create policy "Anyone can upload an avatar."
|
|
on storage.objects for insert with check (bucket_id = 'avatars');
|
|
```
|
|
|
|
### 3. Get Your API Credentials
|
|
|
|
1. Go to **Project Settings** (the cog icon)
|
|
2. Open the **API** tab
|
|
3. Copy your **Project URL** and **anon/public key**
|
|
|
|
### 4. Configure Environment Variables
|
|
|
|
Create a `.env.local` file in the project root:
|
|
|
|
```bash
|
|
VITE_SUPABASE_URL=YOUR_SUPABASE_URL
|
|
VITE_SUPABASE_PUBLISHABLE_KEY=YOUR_SUPABASE_PUBLISHABLE_KEY
|
|
```
|
|
|
|
Replace the values with your actual Project URL and key.
|
|
|
|
### 5. Install Dependencies
|
|
|
|
```bash
|
|
npm install
|
|
```
|
|
|
|
### 6. Run the Application
|
|
|
|
```bash
|
|
npm run dev
|
|
```
|
|
|
|
Open your browser to [http://localhost:5173](http://localhost:5173) 🚀
|
|
|
|
## Building from Scratch
|
|
|
|
If you want to build this app from scratch, follow these steps:
|
|
|
|
### Initialize a React App
|
|
|
|
Use [Vite](https://vitejs.dev/guide/) to create a new React app:
|
|
|
|
```bash
|
|
npm create vite@latest supabase-react -- --template react
|
|
cd supabase-react
|
|
```
|
|
|
|
### Install Supabase
|
|
|
|
Install the Supabase JavaScript client:
|
|
|
|
```bash
|
|
npm install @supabase/supabase-js
|
|
```
|
|
|
|
### Set Up Environment Variables
|
|
|
|
Create a `.env.local` file with your Supabase credentials (see step 4 above).
|
|
|
|
### Create the Supabase Client
|
|
|
|
Create `src/supabaseClient.js`:
|
|
|
|
```javascript
|
|
import { createClient } from '@supabase/supabase-js'
|
|
|
|
const supabaseUrl = import.meta.env.VITE_SUPABASE_URL
|
|
const supabasePublishableKey = import.meta.env.VITE_SUPABASE_PUBLISHABLE_KEY
|
|
|
|
export const supabase = createClient(supabaseUrl, supabasePublishableKey)
|
|
```
|
|
|
|
This initializes the Supabase client with your project credentials. These variables are exposed in the browser, which is fine because Row Level Security protects your data.
|
|
|
|
### Optional: Add Styling
|
|
|
|
Update `src/index.css` to style the app. You can find the full CSS file [here](https://raw.githubusercontent.com/supabase/supabase/master/examples/user-management/react-user-management/src/index.css).
|
|
|
|
## Application Structure
|
|
|
|
### Authentication Component (`src/Auth.jsx`)
|
|
|
|
Handles user login with Magic Links - users can sign in with their email without passwords:
|
|
|
|
```javascript
|
|
import { useState } from 'react'
|
|
import { supabase } from './supabaseClient'
|
|
|
|
export default function Auth() {
|
|
const [loading, setLoading] = useState(false)
|
|
const [email, setEmail] = useState('')
|
|
|
|
const handleLogin = async (event) => {
|
|
event.preventDefault()
|
|
setLoading(true)
|
|
|
|
const { error } = await supabase.auth.signInWithOtp({ email })
|
|
|
|
if (error) {
|
|
alert(error.error_description || error.message)
|
|
} else {
|
|
alert('Check your email for the login link!')
|
|
}
|
|
setLoading(false)
|
|
}
|
|
|
|
return (
|
|
<div className="row flex flex-center">
|
|
<div className="col-6 form-widget">
|
|
<h1 className="header">Supabase + React</h1>
|
|
<p className="description">Sign in via magic link with your email below</p>
|
|
<form className="form-widget" onSubmit={handleLogin}>
|
|
<div>
|
|
<input
|
|
className="inputField"
|
|
type="email"
|
|
placeholder="Your email"
|
|
value={email}
|
|
required={true}
|
|
onChange={(e) => setEmail(e.target.value)}
|
|
/>
|
|
</div>
|
|
<div>
|
|
<button className={'button block'} disabled={loading}>
|
|
{loading ? <span>Loading</span> : <span>Send magic link</span>}
|
|
</button>
|
|
</div>
|
|
</form>
|
|
</div>
|
|
</div>
|
|
)
|
|
}
|
|
```
|
|
|
|
### Avatar Upload Component (`src/Avatar.jsx`)
|
|
|
|
Manages profile photo uploads using Supabase Storage:
|
|
|
|
- Downloads existing avatar images
|
|
- Handles file uploads to the `avatars` bucket
|
|
- Provides visual feedback during upload
|
|
|
|
See the full component in [`src/Avatar.jsx`](src/Avatar.jsx).
|
|
|
|
### Account Management Component (`src/Account.jsx`)
|
|
|
|
Allows users to view and edit their profile:
|
|
|
|
- Fetches user profile data from the `profiles` table
|
|
- Updates profile information (username, website, avatar)
|
|
- Displays the current user's email
|
|
- Provides sign-out functionality
|
|
|
|
Key features:
|
|
|
|
- Uses the `user` prop (not `session`) passed from the parent component
|
|
- Implements proper cleanup with the `ignore` flag to prevent race conditions
|
|
- Updates profile data with `upsert` to handle both inserts and updates
|
|
|
|
See the full component in [`src/Account.jsx`](src/Account.jsx).
|
|
|
|
### Main App Component (`src/App.jsx`)
|
|
|
|
The root component that manages authentication state:
|
|
|
|
```javascript
|
|
import { useState, useEffect } from 'react'
|
|
import './App.css'
|
|
import { supabase } from './supabaseClient'
|
|
import Auth from './Auth'
|
|
import Account from './Account'
|
|
|
|
function App() {
|
|
const [user, setUser] = useState(null)
|
|
|
|
useEffect(() => {
|
|
// Get initial user on mount
|
|
supabase.auth.getUser().then(({ data: { user } }) => {
|
|
setUser(user)
|
|
})
|
|
|
|
// Listen for auth changes
|
|
supabase.auth.onAuthStateChange(async () => {
|
|
const {
|
|
data: { user },
|
|
} = await supabase.auth.getUser()
|
|
setUser(user)
|
|
})
|
|
}, [])
|
|
|
|
return (
|
|
<div className="container" style={{ padding: '50px 0 100px 0' }}>
|
|
{!user ? <Auth /> : <Account key={user.id} user={user} />}
|
|
</div>
|
|
)
|
|
}
|
|
|
|
export default App
|
|
```
|
|
|
|
**Important:** This component uses the [`getUser()`](https://supabase.com/docs/reference/javascript/auth-getuser) method instead of `getSession()`. The `getUser()` method:
|
|
|
|
- Performs a network request to the Supabase Auth server
|
|
- Validates the current session on the server side
|
|
- Returns the most up-to-date user information
|
|
- Is more reliable than reading from local storage
|
|
|
|
## Understanding Row Level Security
|
|
|
|
This project uses Postgres Row Level Security to provide fine-grained authorization:
|
|
|
|
- When a user logs in, they receive a JWT with the role `authenticated` and their UUID
|
|
- These details enable precise control over what each user can access
|
|
- The policies ensure:
|
|
- All profiles are viewable by everyone
|
|
- Users can only insert their own profile
|
|
- Users can only update their own profile
|
|
- Avatar images are publicly accessible
|
|
- Any authenticated user can upload an avatar
|
|
|
|
This approach keeps your data secure while maintaining a simple client-side implementation.
|
|
|
|
## Project Files
|
|
|
|
```
|
|
react-user-management/
|
|
├── src/
|
|
│ ├── App.jsx # Main app component with auth state
|
|
│ ├── Auth.jsx # Login component with Magic Links
|
|
│ ├── Account.jsx # Profile management component
|
|
│ ├── Avatar.jsx # Avatar upload component
|
|
│ ├── supabaseClient.js # Supabase client initialization
|
|
│ ├── App.css # App styles
|
|
│ └── index.css # Global styles
|
|
├── .env.local # Environment variables (create this)
|
|
├── package.json
|
|
└── vite.config.js
|
|
```
|
|
|
|
## Learn More
|
|
|
|
- [Supabase Documentation](https://supabase.com/docs)
|
|
- [Supabase Auth](https://supabase.com/docs/guides/auth)
|
|
- [Supabase Storage](https://supabase.com/docs/guides/storage)
|
|
- [Row Level Security](https://supabase.com/docs/guides/auth#row-level-security)
|
|
- [React Documentation](https://react.dev/)
|
|
- [Vite Documentation](https://vitejs.dev/)
|
|
|
|
## Troubleshooting
|
|
|
|
**Magic link not working?**
|
|
|
|
- Check your email spam folder
|
|
- Verify your site URL is configured correctly in Supabase Dashboard → Authentication → URL Configuration
|
|
|
|
**Images not uploading?**
|
|
|
|
- Ensure the `avatars` bucket exists in Storage
|
|
- Check that storage policies are correctly set up
|
|
|
|
**Profile not updating?**
|
|
|
|
- Verify the `profiles` table exists
|
|
- Check that Row Level Security policies are active
|
|
|
|
## Authors
|
|
|
|
- [Supabase](https://supabase.com)
|
|
|
|
Supabase is open source. We'd love for you to follow along and get involved at [github.com/supabase/supabase](https://github.com/supabase/supabase)
|