 614faed4e4
* using slack clone to test

* updates auth functions to handle new GUC commands

* move postgREST to new version

* testing with todo list

* makeing our mount setup far more robust

* Adds some usage commands

* cleans up the auth functions

* test with todos app

* fix env var for GUC

* new auth functions - changed for performance improvement

* Adds some integration tests for RLS

* anon volume on postgres

* remove unused helpers

* fix broken docusaurus build

* Fix complaining vercel

* test instructions

* Use named imports

* Fixes imports

* all relative

* chore: add in tsconfig.json to /web

* finding these all over the place

* Update docker/docker-compose.yml

Co-authored-by: Steve Chavez <stevechavezast@gmail.com>

Co-authored-by: Jonathan Summers-Muir <MildTomato@users.noreply.github.com>
Co-authored-by: Steve Chavez <stevechavezast@gmail.com>
Todo example using Supabase
- Frontend:
- Next.js - a React framework for production.
- Tailwind for styling and layout.
- Supabase.js for user management and realtime data syncing.
- Backend:
- app.supabase.io: hosted Postgres database with restful API for usage with Supabase.js.
Demo
Deploy with Vercel
The Vercel deployment will guide you through creating a Supabase account and project. After installation of the Supabase integration, all relevant environment variables will be set up so that the project is usable immediately after deployment 🚀

Build from scratch
1. Create new project
Sign up to Supabase - https://app.supabase.io and create a new project. Wait for your database to start.
2. Run "Todo List" Quickstart
Once your database has started, run the "Todo List" quickstart. Inside of your project, enter the SQL editor tab and scroll down until you see TODO LIST: Build a basic todo list with Row Level Security.
3. Get the URL and Key
Go to the Project Settings (the cog icon), open the API tab, and find your API URL and anon key, you'll need these in the next step.
The anon key is your client-side API key. It allows "anonymous access" to your database, until the user has logged in. Once they have logged in, the keys will switch to the user's own login token. This enables row level security for your data. Read more about this below.
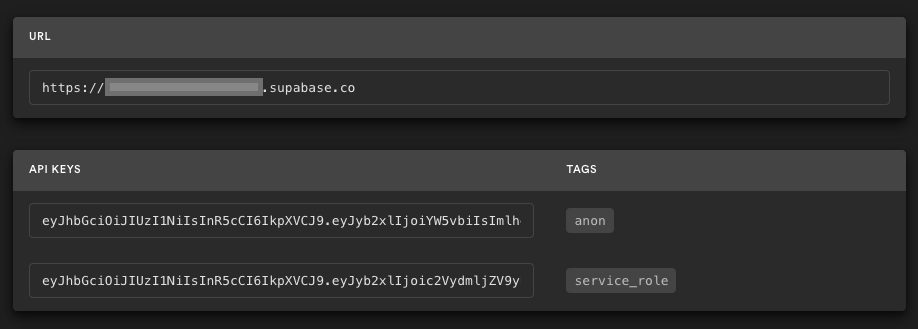
NOTE: The service_role key has full access to your data, bypassing any security policies. These keys have to be kept secret and are meant to be used in server environments and never on a client or browser.
Supabase details
Postgres Row level security
This project uses very high-level Authorization using Postgres' Role Level Security.
When you start a Postgres database on Supabase, we populate it with an auth schema, and some helper functions.
When a user logs in, they are issued a JWT with the role authenticated and their UUID.
We can use these details to provide fine-grained control over what each user can and cannot do.
This is a trimmed-down schema, with the policies:
create table todos (
  id bigint generated by default as identity primary key,
  user_id uuid references auth.users not null,
  task text check (char_length(task) > 3),
  is_complete boolean default false,
  inserted_at timestamp with time zone default timezone('utc'::text, now()) not null
);

alter table todos enable row level security;

create policy "Individuals can create todos." on todos for
    insert with check (auth.uid() = user_id);

create policy "Individuals can view their own todos. " on todos for
    select using (auth.uid() = user_id);

create policy "Individuals can update their own todos." on todos for
    update using (auth.uid() = user_id);

create policy "Individuals can delete their own todos." on todos for
    delete using (auth.uid() = user_id);
Authors
Supabase is open source. We'd love for you to follow along and get involved at https://github.com/supabase/supabase